
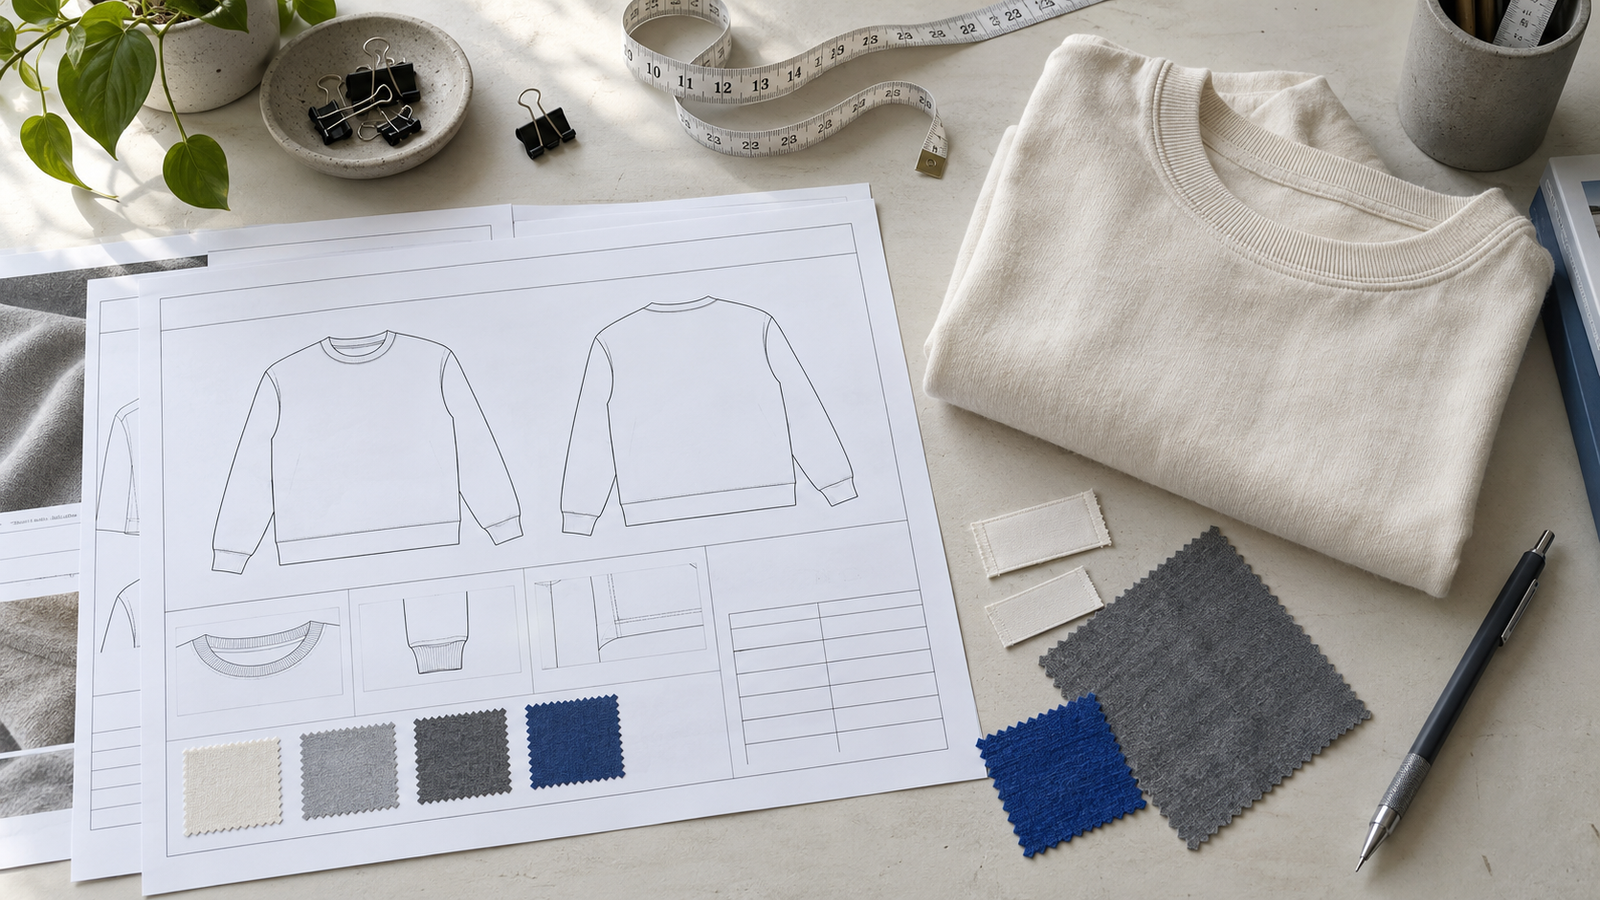
A reference image might show a dropped shoulder. It rarely tells a pattern maker how far that shoulder should drop, where to measure it, or which sample version the brand approved. Those missing decisions are what a tech pack should make visible.
You do not need to settle every detail before the first conversation. You do need to separate confirmed requirements from open questions. This guide covers the fields shared across clothing categories; the examples are editorial illustrations, not production-ready specifications or universal fit standards.
What should a clothing tech pack include?
Organize the pack around one identifiable style and a controlled revision. Different teams use different layouts, but the same practical questions remain: what are we making, from which materials, to which dimensions, and which decisions are current?

Give the cover or style brief a style ID, product name, intended wearer, base size, revision number, date and owner. Carry the style ID and revision into drawings, artwork filenames and sample comments so an attachment cannot easily be mistaken for another version.
| Document | What it communicates | What is still missing |
|---|---|---|
| Reference image or mood board | Silhouette, visual direction and styling intent. | Hidden construction, exact material choices and measurable requirements. |
| Measurement or size chart | Dimensions for named sizes, if the measurement method is defined. | Materials, construction, artwork and approval history. |
| Tech pack | A connected specification plus review records. | Any field left open still needs an owner and a decision. |
Use “TBD” deliberately
“TBD” means a decision is needed. Add who will resolve it and by when. A blank cell can mean forgotten, not applicable or undecided; use explicit status labels so the manufacturer does not have to guess.
Use technical flats and construction callouts
Technical flats show the garment without the styling and pose of a fashion illustration. Include front and back views, then add a detail view when a pocket, opening, facing, seam or fastening cannot be understood from the main drawing.

Link each callout to a written requirement. A color fill cannot reliably communicate fabric composition. A dashed line may show stitching, but it does not define every stitch or seam requirement. State the construction intent and ask the development team to resolve technical details you have not specified.
Include close-up reference photos only when they clarify a particular detail. Label what should be followed and what should not. “Use this neckline construction, not this garment’s fit” is more useful than an unannotated image folder.

Build a bill of materials that can be checked
A bill of materials (BOM) identifies the fabrics, trims and other components used in the style. Techpacker’s official guidance treats the BOM as the place to organize a product’s materials and details.[1] For your own pack, give each component an ID and connect that ID to the flat drawing and any physical reference.
Record composition, fabric structure, weight where relevant, color reference, supplier or material reference, intended location and approval status. Include quantity and unit when consumption has been established; do not invent fabric usage just to fill the table.
| ID / location | Specification to record | Color / reference | Decision status |
|---|---|---|---|
| F01 / main body | Jersey; 100% cotton; 240 g/m² in this fictional example. | Physical swatch C01; shade still to approve. | Proposed; sample material not yet confirmed. |
| F02 / neckline | Rib structure, composition, weight and recovery requirement: TBD. | Coordinate with approved body shade. | Developer to propose options. |
| T01 / sewing thread | Thread type, size and construction compatibility: TBD. | Match approved fabric; record the selected reference. | Supplier to identify; brand to review. |
| L01 / information label | Dimensions, substrate, attachment and approved wording. | Artwork file and revision; final market language. | Hold artwork until composition is confirmed. |
Illustrative entries only. These values are not Yuchen’s standard fabric, required composition, consumption allowance or an approved customer project.
A shade name such as “washed black” needs a reference and an approval method. Record the color system and reference code if you use one, plus the physical swatch, lab dip or print proof that will govern approval. Keep a screen image for orientation, then agree how the actual material will be evaluated.
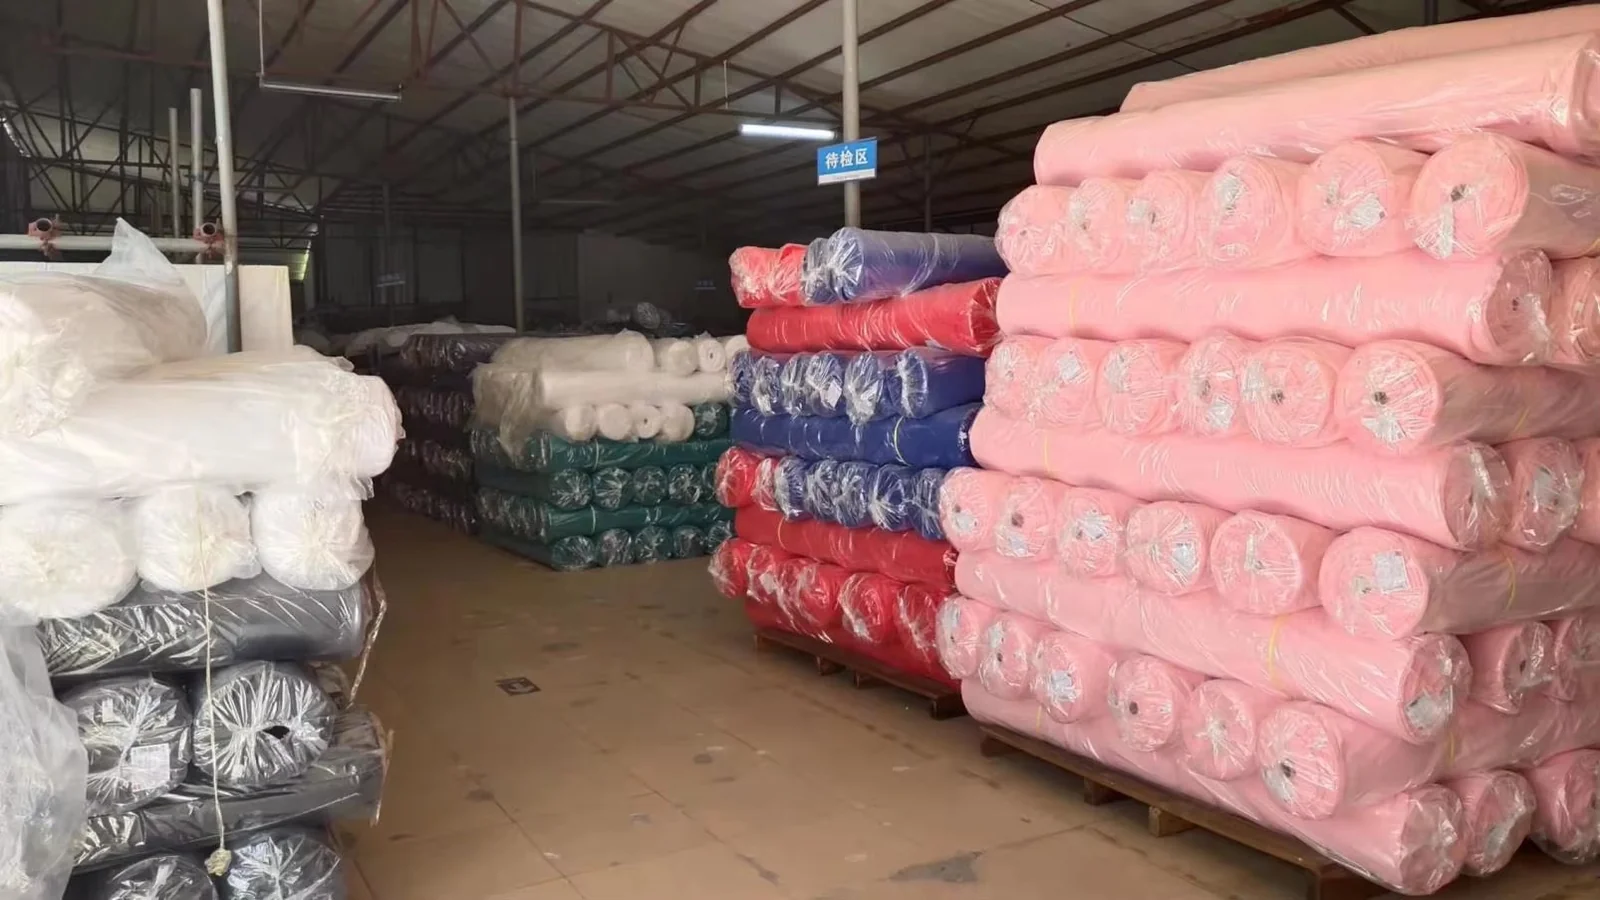
Fabric weight alone does not describe the whole material. Structure, composition, finish and intended performance also matter. Use the fabric GSM guide when discussing weight, and record the final choice in the BOM rather than leaving it only in an email.
Define the measurement method, unit and tolerance
A point of measurement (POM) is useful only when two people can measure it the same way. Give it an ID, a clear description, a diagram, a unit, a size and the measurement conditions. Techpacker’s measurement documentation records POMs, size-specific specifications and tolerances.[2]
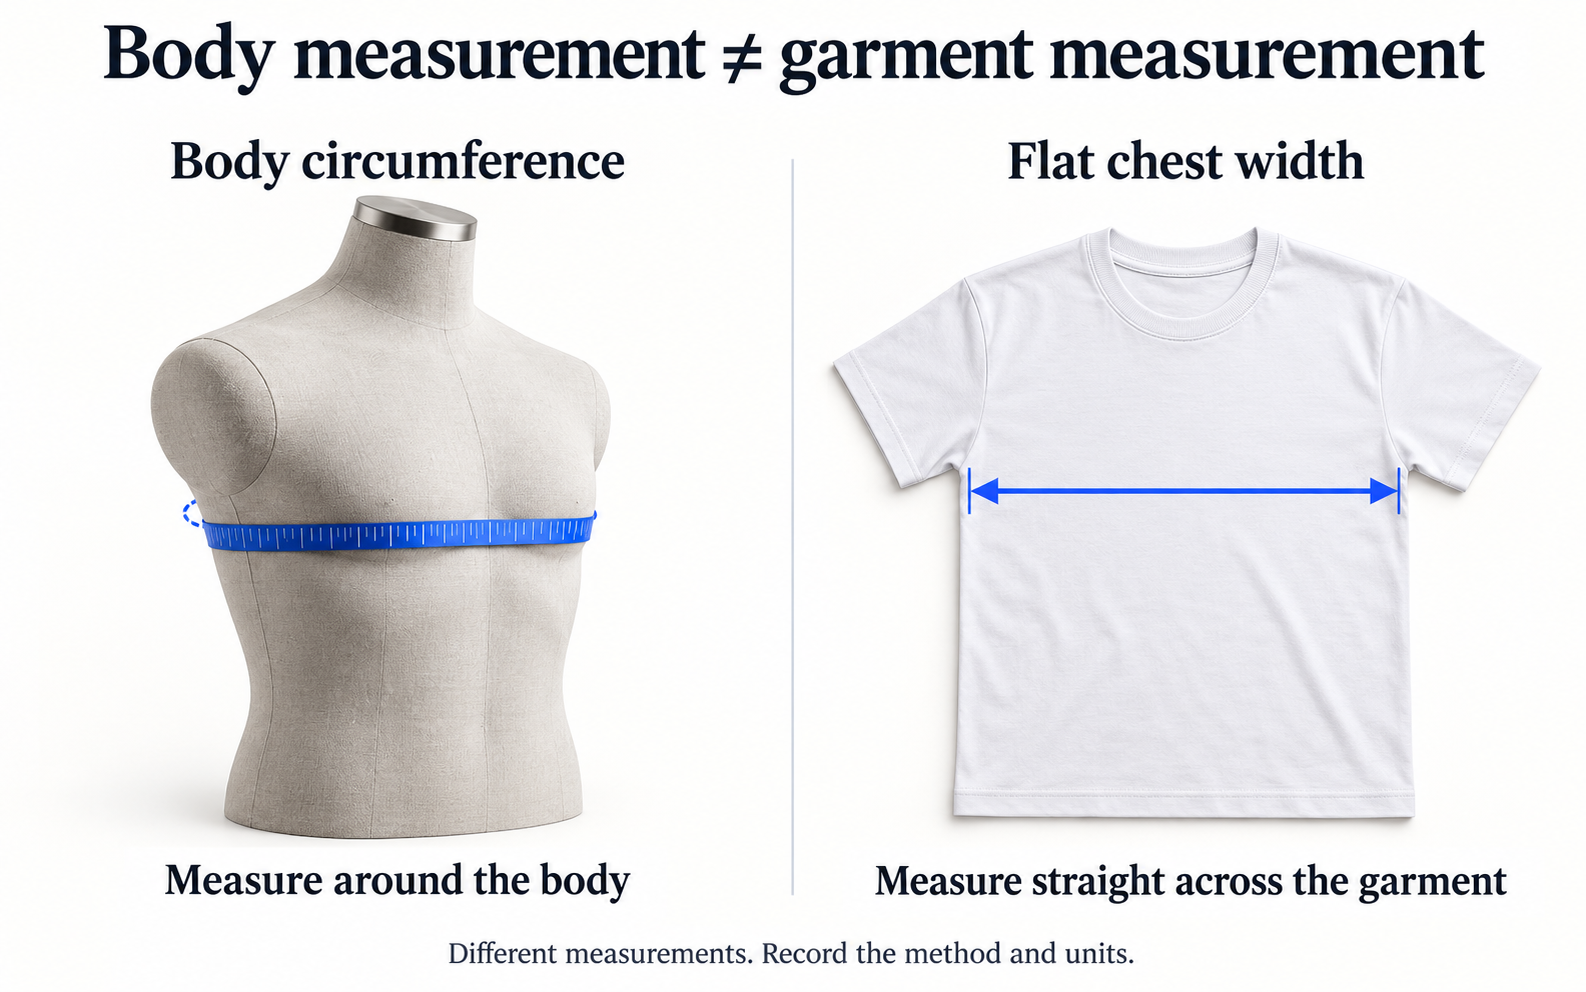
Do not mix body dimensions with finished-garment dimensions. ISO 8559-1 concerns anthropometric body-measurement definitions, not a ready-made measurement table for your finished garment.[3] Likewise, doubling a flat garment width does not tell you what body size or fit it is intended to serve.
Write the unit, even when it feels obvious
NIST defines 1 inch as exactly 2.54 centimeters.[4] This is a unit-conversion example, not a recommended garment dimension. Converting units does not turn a body measurement into a garment measurement.
Specify whether the garment is relaxed or stretched, fastened or open, and measured before or after any agreed treatment. For a flat width, show the horizontal measuring line and its distance from a repeatable reference point. “Chest: 50” leaves too much interpretation.
A tolerance is an agreed interval, not a generic promise
A target dimension and its tolerance belong to a particular POM and product. Agree them with the development and production team. The example below shows the arithmetic; it does not prescribe a tolerance for every seam, fabric or style.
Complete fictional POM entry: POM A · Flat chest width · Measure straight across, 2.5 cm below the armhole, with the garment relaxed and laid flat · Sample size M · Target 50.0 cm · Tolerance ±1.0 cm. Every number here is for this teaching example.
Fictional measurement example · centimeters
Target 50.0 cm, agreed tolerance ±1.0 cm
Illustrative permitted interval: 49.0–51.0 cm. The measuring method and conditions are assumed to be identical.
| Recorded result | Difference from target | For this POM only |
|---|---|---|
| Sample A: 49.4 cm | 49.4 − 50.0 = −0.6 cm | Inside the example interval. |
| Sample B: 51.4 cm | 51.4 − 50.0 = +1.4 cm | Outside the example interval; review needed. |
Keep sample measurements and comments in the review record. If the intended target changes, revise the specification explicitly. Do not overwrite the target with the sample’s actual measurement simply to make the two agree. Mark preliminary grading clearly, and confirm the size specifications after reviewing the base fit and agreeing the size strategy.
Connect artwork, labels and packaging to the garment
Attach the production artwork file as well as a placement view. Record its filename and revision, actual artwork dimensions, method, color references and distances from defined garment landmarks. A centered mockup cannot establish the print’s final size or its distance from a neckline seam.
Print or embroidery
Name the method, dimensions, orientation and placement. Clarify whether a distance is measured to the artwork’s top edge, center or bounding box; record the approved proof or strike-off.
Labels and trims
Identify each component in the BOM, then show its location, dimensions, attachment and artwork version. Check that composition wording matches the confirmed material.
Packaging
State the fold, packing unit, bag or wrapper, barcode or sticker location, and any carton instructions relevant to the project. Separate consumer-label text from warehouse identifiers.
Label content also depends on the destination market. The FTC’s guidance addresses fiber content, country of origin and responsible-business identification for most covered U.S. textile products; care instructions fall under a separate rule.[5] European Commission guidance covers fiber-composition labels and the relevant market languages in the EU.[6]
Use those requirements to assign a responsible person and a review step. A layout marked “approved” should not contain provisional fiber information. These sources are not a complete product-compliance checklist; confirm the current requirements for your garment and destination. Our labels and packaging guide covers the broader planning questions.
Record revisions and approve a specific version
A useful tech pack changes during development. Techpacker’s version-control guidance describes keeping versions as the specification evolves.[7] Whether you use specialist software or a workbook and PDF, keep the changed field, previous requirement, new requirement, date, owner and approval status traceable.

YC-DEMO-02_Rev02_2026-10-02_TECHPACK.xlsxStyle ID → revision → revision date → document type. Here, YC-DEMO-02 is a fictional style ID, Rev02 means revision 2, and 2026-10-02 is the example revision date. Replace these with your own details.
Keep the style ID, revision and date consistent across the workbook, shared PDF and related artwork. Use a clear revision number instead of names such as “final-final-new.”
The filename above is an example, not a download link. Download the editable Excel starter template to prepare your own tech pack.
For each sample, record its ID, the tech-pack revision used, the materials actually used and any agreed substitutions. Write comments so they can be acted on: identify the issue, show the actual result, state the required change and name the owner.
Before sharing a revision, remove contradictory notes and mark superseded files. Archive the earlier version rather than silently replacing it. A pre-production approval should identify the sample, the document revision, the reviewer and any remaining exceptions; it should not be inferred from a file being emailed.
Download the clothing tech pack starter template
The editable workbook gives you a common structure for a style brief, BOM, measurements, artwork and labels, sample review, revision log and open decisions. It leaves production values for you and your development partner to define.
One workbook, a clear starting point
Eight worksheets. Editable fields. A separate place for unanswered questions.
General starter structure—not a completed pattern, graded size specification or production approval.
- Name the style and revision. Fill in the brief and identify the purpose of the first sample.
- Attach the visual references. Link drawings, artwork and swatch IDs to their corresponding fields.
- Record what is known. Enter confirmed requirements and move unresolved choices to Open decisions.
- Review the gaps together. Agree owners, sample scope and the version to be used before work starts.
Before you send the pack
0 of 8 reviewedReview each item against your files. The count tracks reviewed items, not readiness certification.
Checkmarks are not saved or submitted. Keep your working record in the downloaded files.
For early development, clearly recorded open questions are useful. Before bulk production, resolve the requirements that affect materials, fit, construction and labeling, and document the approvals. Our clothing sampling guide explains how those decisions move through development.
Common tech pack questions
Can I make a tech pack in Excel?
Yes. A spreadsheet can hold specifications and review records, with drawings and artwork attached or clearly referenced. What matters is that the files are complete enough for the task, consistently identified and controlled by revision. Keep an editable master and agree the format shared with your supplier.
Can a reference photo replace a tech pack?
A reference photo can start the discussion, but it usually leaves dimensions, materials and construction open. Ask who will convert that reference into the technical documents, what the development includes and which files you will receive.
Do I need every size before the first sample?
Agree what the sample is intended to test. An initial fit sample may focus on a base size, while later development needs the agreed size range and grading information. Do not present one base-size measurement sheet as a complete specification for all sizes.
Is there a standard page count or tolerance?
No single page count makes a tech pack complete. Include enough detail to define the garment and its current decisions. Tolerances need to be agreed for the relevant measurements and product; the ±1.0 cm example in this guide is illustrative.
Does a tech pack guarantee an accurate sample?
No. It creates a shared reference for development and review. Material substitutions, interpretation, pattern work and manufacturing still need checking. Review the physical sample and record what was approved, changed or left open.
Sources & reading notes
Sources were checked on 2 October 2026. Techpacker links are software-publisher guidance, NIST and government links support their specific factual points, and ISO is cited only for the stated scope of its standard. The diagrams, BOM entries and tolerance example are editorial teaching materials.
- Techpacker / PLMBR Help Center — How to create material tableBOM purpose and component categories; example entries in this article are our own.
- Techpacker / PLMBR Help Center — How to create measurements tablePOM, sample-size specification and tolerance fields; no universal garment tolerance is implied.
- International Organization for Standardization (ISO) — ISO 8559-1:2017 — Size designation of clothes — Part 1: Anthropometric definitions for body measurementPublic abstract consulted for the scope of body-measurement definitions; not a finished-garment size chart.
- National Institute of Standards and Technology (NIST) — NIST Handbook 44 (2026), Appendix C: General Tables of Units of MeasurementAppendix C, p. C-21: 1 inch = 2.54 cm exactly. The displayed conversion is calculated.
- Federal Trade Commission (FTC) — Threading Your Way Through the Labeling Requirements Under the Textile and Wool ActsU.S. textile-label information fields. The separate care-label rule and product exceptions require their own review.
- European Union — Your Europe — Textile LabelEU fiber-composition and market-language guidance; not a complete product-compliance checklist.
- Techpacker / PLMBR Help Center — How to create a techpack versionOfficial software guidance on saving dated versions; our filename and approval workflow are editorial recommendations.
No source endorses Yuchen, this template or a particular production specification. Use the workbook to organize agreed requirements, not to substitute for product development or destination-market review.
A comment that can be followed
Unclear: “Make it smaller.”
Specific: “Sample B / POM A: measured 51.4 cm against the Rev02 target of 50.0 cm. Review the cause and propose a correction. Keep the approved target unchanged unless a fit change is agreed.”
Same fictional values as the tolerance example. This is a review instruction, not a pattern-adjustment calculation.