

01 / Choose the effect you need
Embroidery vs screen printing: which fits your garment?
Start with the garment, the artwork at finished size and the intended wearing experience. A compact chest emblem on a sweatshirt and a broad back graphic on a lightweight tee create different requirements, even when both belong to the same collection.
Embroidery builds an image with thread stitched through the fabric. Screen printing deposits ink through prepared mesh screens; the ink system then needs its specified cure.[4][6] The choice changes the surface, the reverse side and the production work—not simply the appearance of a logo in a mockup.
| Priority | Embroidery | Screen printing |
|---|---|---|
| Compact, textured emblem | A strong candidate when visible thread is part of the design. | A candidate when a flatter graphic is preferred. |
| Large solid graphic | Review stitch coverage, weight, flexibility and cost carefully. | Request the proposed ink and a full-size hand-feel sample. |
| Small lettering or fine gaps | Confirm digitizing, thread and a sew-out at final size. | Confirm separation and stencil detail on the actual fabric. |
| Light or stretchy jersey | Check support, distortion and inside comfort. | Check movement, ink coverage and care performance. |
| Repeat production | Retain the approved stitch file, thread references and sample. | Retain the approved separations, ink references and sample. |
This matrix proposes what to sample. It is not a universal quality, durability or price ranking.
02 / Translate the artwork
Compare the finished detail, not just the digital logo

For embroidery, approve the translation into stitches
Digitizing turns the artwork into instructions for stitches. Ask the digitizer to identify any simplified shapes, altered gaps or changed lettering before the sew-out—the physical stitched sample. Keep the final width, height, fabric and thread specification attached to that version.
There is no useful single minimum letter height for every embroidery job. Madeira describes thinner thread options for small lettering and intricate detail, with matching needle and digitizing recommendations.[3] Treat that as a system to validate, not permission to approve every small font without a sample.
Inspect the open spaces inside letters, narrow strokes and outline alignment. View the sample at normal reading distance as well as close up. More stitches are not automatically a better result; ask what the proposed stitch structure is intended to achieve.
For screen printing, confirm the separation and ink system
A screen-print proposal should explain how the artwork becomes printable separations and whether it needs an underbase. Brother describes screen preparation and color registration as part of this workflow.[4] Ask which visible details need adjustment and approve the resulting graphic at its actual size.
Confirm color against a physical reference. Thread sheen and stitch direction affect how an embroidered color is seen; a printed color sits in a different surface system. Request an acceptable visual relationship between them rather than assuming the same named color will look identical in both processes.
03 / Turn the sample over
Backing, fabric stability and skin contact matter
A convincing front view is only half of an embroidery review. Turn the garment inside out, then handle it in the position where the decoration will be worn. Check the supporting material, trimmed edges, thread ends and any extra finishing layer.
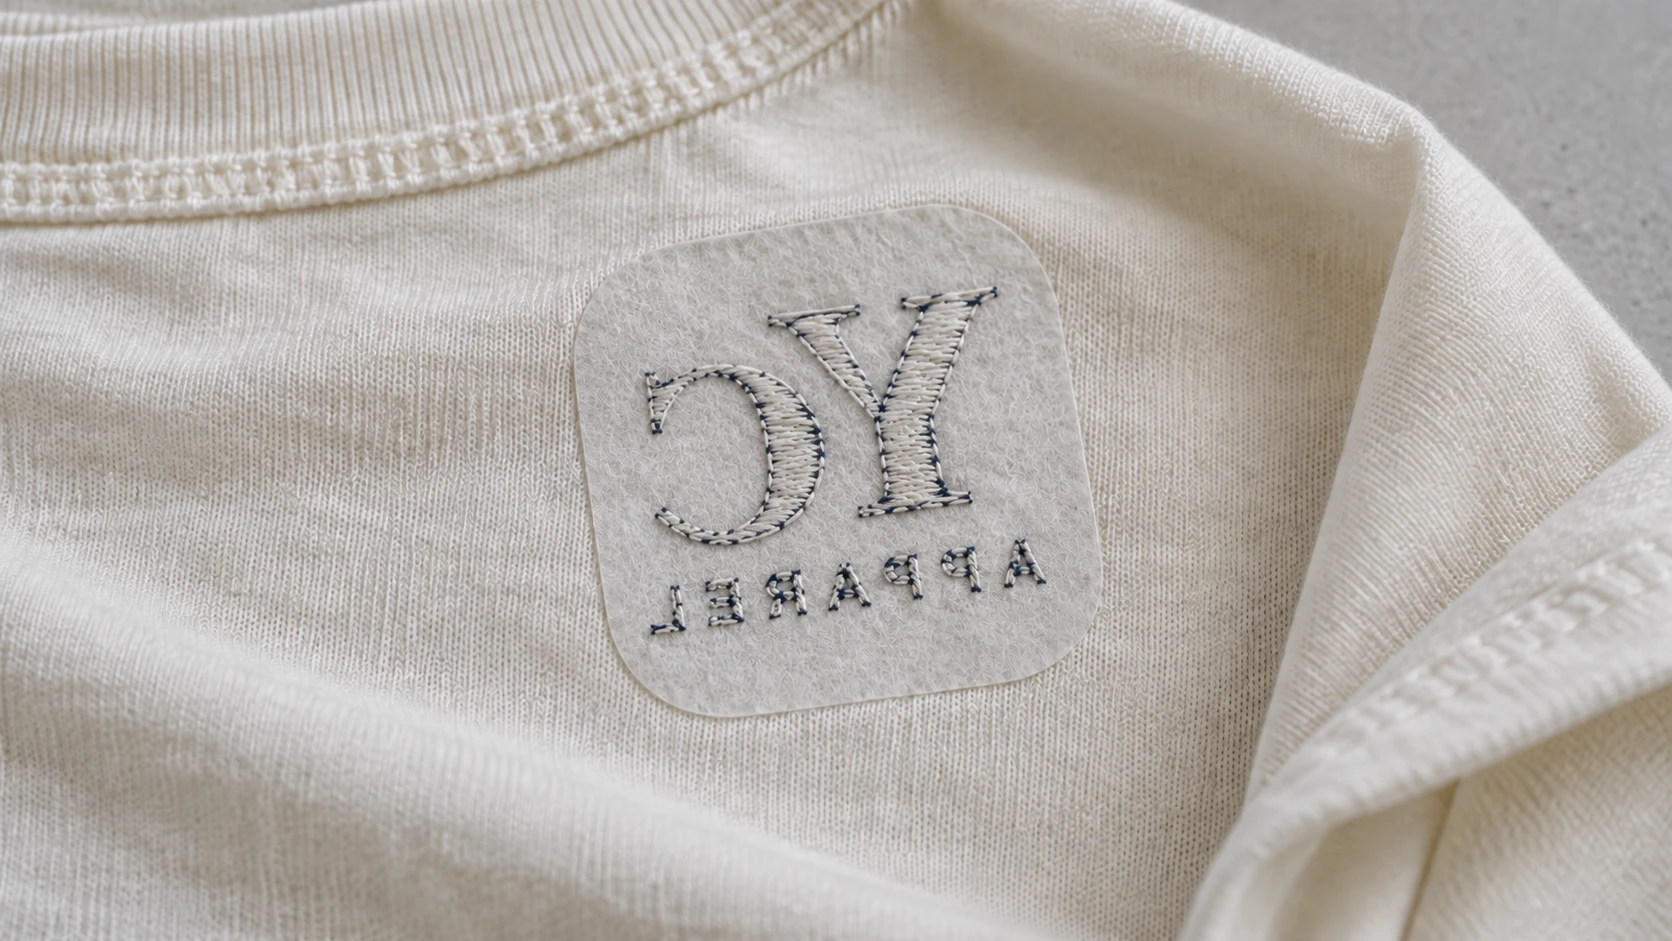
Madeira identifies fabric stability, design density and laundering among the factors in backing selection. Its guide describes cut-away support for stretchy knits, and topping that helps stitches remain visible on lofty fabrics.[1] Ask the decorator to specify the combination for your garment.
A backing stabilizes the embroidery; a covering layer over the finished reverse serves a different purpose. Madeira also describes finishers used to cover the underside.[1] If one is proposed, review its feel and adhesion after the agreed care procedure.
- Light T-shirt: inspect whether the decoration pulls the surrounding jersey or shows a backing outline.
- Fleece or terry: check whether the design remains legible on the textured surface.
- Next-to-skin position: assess the complete reverse, not only the softness of the face thread.
Screen printing also needs a hand-feel review. Ink type and coverage matter: Avient offers water-based screen inks designed for a soft fabric feel.[5] This does not make every screen print equally soft. Bend and wear the full-size decorated sample before accepting it.
04 / Check the scale and position
A bigger logo changes more than its width
The example below shows the rectangular boundary around an artwork. Doubling both dimensions makes that bounding area four times as large. It does not establish four times the stitches, ink use or price: an open outline and a filled design occupy their boundaries differently.
Geometry example · not a production estimate
Same proportions. Different area.
Area = width × height. Bars share a zero baseline and represent bounding-box area only. Dimensions are teaching examples, not recommended logo sizes.
Wilcom’s estimating documentation requires finished design dimensions and notes that changing size updates estimated stitch count and production costs.[2] Ask for a revised estimate when the size changes, then validate the revised sew-out.

Check placement with the garment hanging naturally. A hood can cover a back graphic; a pocket or seam can restrict access. Ask whether decoration is proposed on a panel or on the assembled garment. Confirm the result on the relevant sizes, including any approved changes in graphic scale.
05 / Ask for a comparable quotation
Is embroidery more expensive than screen printing?
It can be, but a process name is not a quotation. Compare the same design size, garment, placement and quantity. Embroidery proposals may separate digitizing and stitching; screen-print proposals may separate artwork, screens and production. Confirm what is already included before adding fees.
| Quotation item | Embroidery | Screen printing |
|---|---|---|
| Preparation | Digitizing, sample sew-out and revision scope. | Separations, screens, setup and sample scope. |
| Production basis | Finished dimensions, estimated/final stitch count, thread changes, backing and placement. | Separations, underbase, ink system, print area and locations. |
| Quantity | Same total, size/color split, price band and delivery scope. | |
| Repeat order | File retention, revised sizing and repeat setup terms. | Screen/separation retention and repeat setup terms. |
Wilcom distinguishes estimates based on artwork from the configured price tables that produce a cost.[2] A quoted stitch count is useful context, not a universal currency conversion. Do not infer a supplier’s price from another shop’s rate per thousand stitches.
For either route, calculate the decoration total as applicable one-time charges plus quantity multiplied by the applied decoration rate. Confirm minimum charges, extra locations, inspection, rejected pieces, freight and tax separately. Request a fresh quote if the scope changes; there is no universal order quantity at which one method becomes cheaper.
06 / Approve the complete sample
Compare appearance, comfort and care results together
Use the intended garment and shade, the same artwork revision and agreed final dimensions. Identify each physical sample. If one process needs a modified graphic, retain both files and record the difference.
- Front: compare readability, color, edges, registration and placement.
- Reverse and wear: inspect backing, thread ends, print hand, drape and surrounding fabric.
- Care: agree washing/drying conditions, cycles and acceptance criteria; retain an unwashed reference.
- Decision: record what passed, what needs revision and the exact approved sample/file.
For embroidery, review thread appearance, loose stitches and fabric distortion after care. For print, review fading, cracking and adhesion. Avient’s curing guidance explains why ink temperature, time and the material system matter; a dryer setting alone is insufficient evidence.[6]
AATCC TM61 addresses colorfastness to accelerated laundering.[7] Its public scope does not establish a blanket lifetime ranking for embroidery and print. Agree appropriate methods with the supplier or laboratory; do not treat a generic wash-count claim as approval of your garment.
The clothing sampling guide connects this decoration review with fit, construction and the final specification.
07 / Make the next request specific
Send one decoration brief and keep two review records
Supply the artwork, finished size, placement drawing, garment material and shade, quantities and care expectations. Ask each decorator to record required changes, proposed materials, quotation scope and the sample reference.
Free working template
Embroidery & screen-print comparison sheet
Keep the shared brief, separate proposals, front/reverse observations and approval decision together.
Works offline. Entries are not transmitted or saved automatically. Export before closing.
Save the offline sheet ↓Match the decoration to the garment
Developing custom hoodies and sweatshirts or custom T-shirts? Share the artwork and material brief so the team can confirm a suitable sampling route.
Discuss your decoration brief →Questions about embroidery and screen printing
Is embroidery always more durable?
No universal ranking applies. Thread, backing, digitizing, ink, curing, garment fabric and care all affect the finished result. Review comparable samples and agreed care evidence.
Can a lightweight T-shirt be embroidered?
It can be a candidate, but validate the design and support on the actual jersey. Check surrounding fabric, backing visibility and next-to-skin comfort before approval.
Can one artwork file be used for both methods?
Use one approved master artwork, then retain the process-specific stitch file or print separations. Record any design changes and approve physical samples at final size.
Can embroidery and screen printing be combined?
Yes, as a proposed design approach. Confirm placement, production sequence, access and care compatibility on the complete garment. Combining two approved swatches does not automatically approve the assembled product.
Sources and technical references
Primary sources checked on 17 October 2026. They support the cited process facts; the selection framework is editorial guidance. Dimensions and visuals are illustrative, not factory test results.
- Madeira USA: Embroidery Backing Options ExplainedBacking-selection factors, cut-away support, topping and reverse-side finishers. Product guidance, not a prescribed backing for every garment.
- Wilcom: Generate EstimatesFinished dimensions, estimated stitch count and configured production/digitizing prices. Not a universal pricing schedule.
- Madeira USA: Understanding Embroidery ThreadsThread options for fine detail with related needle and digitizing guidance. Product-specific minimum lettering claims are not adopted as universal limits.
- Brother: Screen-Printing Process and PreparationPrepared screens, ink application, separations and registration. Its DTG comparison is used only for screen-process facts.
- Avient: Zodiac Aquarius Soft BaseA water-based screen-ink example designed for soft hand; not evidence that all prints feel alike.
- Avient / Wilflex: Ink Curing Tips2020 technical guide on time, temperature and material variables. No universal cure recipe is prescribed.
- AATCC TM61: Colorfastness to Laundering—AcceleratedPublic purpose and scope; the paid full method was not reviewed. No wash-life guarantee or acceptance limit is inferred.